Blog
DIY Pergola Kit Mistakes to Avoid: The Most Common Sizing and Material Errors
Building a pergola kit yourself can be incredibly rewarding. Done well, it adds usable outdoor space, shade, and long-term value to your home. Done poorly, it can mean crooked posts, roofs that trap heat, drainage problems, or a structure that simply feels “off” every time you use it.
Across Australia, most DIY pergola kit problems don’t come from bad intentions or lack of effort. They come from avoidable planning, sizing, and material mistakes made before the first hole is dug.
This guide breaks down the most common DIY pergola kit mistakes Australians make — and how to avoid them — so your build works with your space, your climate, and the way you actually use your backyard.
Why DIY Pergola Kits Go Wrong (Even for Confident DIYers)
Pergola kits are often marketed as modular and straightforward, but they still need to respond to real-world conditions:
• Uneven ground
• Existing slabs that aren’t square
• Strong sun angles and summer heat
• Coastal corrosion and wind exposure
• Furniture layouts and walkways
• Attachment points on older homes
When these factors aren’t considered early, problems tend to surface halfway through the build — when fixes become harder, more expensive, or structurally limited.
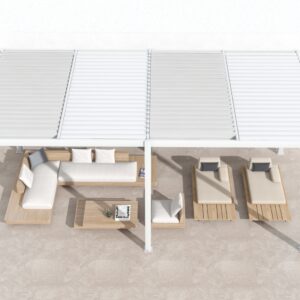
Mistake 1: Choosing a Pergola Size That Looks Right on Paper, Not in Real Life
One of the most common DIY pergola kit mistakes is selecting a size based purely on available space, without thinking about how the area will be used.
Common sizing errors
• Pergola is too narrow once furniture is added
• Roof coverage doesn’t align with doors or windows
• Posts block walkways or sliding door access
• Roof edge finishes mid-patio awkwardly awkwardly
How to avoid it
Before settling on kit dimensions:
• Place outdoor furniture in the space and mark clear walkways
• Allow at least 900–1000mm for comfortable circulation paths
• Check door swing, sliding door clearance, and window openings
• Consider where shade will fall at different times of day
If you’re still in the early stages, a structured pergola kit planning guide can help you think through real-world layouts before you lock in sizes.
Mistake 2: Forgetting to Check Whether the Space Is Square (or Level)
Very few patios, slabs, or yards are perfectly square — especially on older Australian homes. DIYers often assume the pergola kit will “force” everything into alignment. It won’t.
What goes wrong
• Posts end up twisted or angled
• Roof sheets don’t line up properly
• Gaps appear at edges and flashings
• Doors or screens added later don’t fit
How to avoid it
• Measure diagonals across your intended pergola footprint — they should match
• Check levels across the slab or ground in both directions
• Allow for packers or adjustable base plates if permitted by the kit
• Square the structure during temporary bracing, not after fixing permanently
Squareness and level are structural issues, not cosmetic ones.
Mistake 3: Getting Post Spacing Wrong for the Chosen Material
Post spacing is often misunderstood. Many DIYers assume posts can simply be spaced evenly to “look right,” without considering span limits of the material and roof type.
Why this matters
• Overspanned beams can sag over time
• Roof sheets may flex or rattle in the wind
• Fixings are placed under unnecessary stress
• Engineering assumptions may no longer apply
Practical guidance
• Aluminium kits generally allow longer spans than timber
• Heavier roof materials reduce allowable spacing
• Wider pergolas often need intermediate posts or beams
• Spacing should suit both structural load and roof sheet dimensions
Material choice and post spacing should always be considered together — not separately.
Mistake 4: Underestimating the Impact of Roof Material Choice
Roofing isn’t just about rain protection. In Australia, it affects heat, light, noise, drainage, and comfort more than most DIYers expect.
Common DIY roofing mistakes
• Choosing clear polycarbonate in full sun areas
• Not allowing enough fall for water runoff
• Ignoring expansion noise in metal roofing
• Mixing incompatible fixings and sheets
Smarter roofing decisions
• Use tinted or opaque sheets where the summer sun is harsh
• Ensure adequate fall (even if the slab is flat)
• Consider heat build-up beneath low roofs
• Match fixings to roof material to avoid long-term issues
A well-matched roof can be the difference between a pergola that’s used daily and one that’s avoided on hot afternoons.
Mistake 5: Selecting Materials Without Considering Australian Conditions
Material choice is one area where DIY pergola kits often fail long-term — not immediately.
Factors that matter in Australia
• Coastal salt exposure
• Strong UV levels
• Sudden temperature changes
• High winds in open areas
Typical problems
• Premature corrosion near the coast
• Timber movement and splitting
• Fading or chalking finishes
• Fixings reacting with framing materials
A solid pergola materials guide should always factor in where the pergola is being built, not just how it looks on day one.
Mistake 6: Not Planning Footings and Fixings Early Enough
Footings and fixings are rarely visible once the pergola is complete — but they carry most of the structural load.
Common DIY errors
• Shallow footings that move over time
• Fixing to slabs without checking the thickness
• Using incorrect anchors for substrate type
• Inconsistent fixing depths across posts
How to avoid it
• Confirm ground type before choosing footing depth
• Check slab thickness and reinforcement if fixing to concrete
• Use fixings compatible with both material and environment
• Follow manufacturer specifications exactly
In many cases, footing issues don’t show up until months later — when adjustment is no longer simple.
Mistake 7: Ignoring Wind Exposure and Uplift
Even in suburban areas, wind uplift can be significant — especially for wide or open-sided pergolas.
What DIYers often overlook
• Wind entering from unexpected directions
• Roof acting like a sail in gusts
• Uplift forces on fixings and beams
• Differences between attached and freestanding designs
Practical checks
• Assess surrounding buildings, fences, and open areas
• Choose roof styles suited to airflow
• Ensure all connections are secure and rated
• Avoid oversized roofs without appropriate support
For general structural guidance, it’s worth referencing recognised Australian building standards, such as those outlined by the Australian Building Codes Board, particularly when considering wind and structural performance.
Mistake 8: Attaching to the House Without Understanding the Structure
Attached pergola kits introduce extra complexity — especially with older homes.
Risks of poor attachment
• Water ingress behind flashings
• Fixing into non-structural brickwork
• Interference with roof drainage or gutters
• Long-term movement between structures
Better approach
• Identify structural framing behind walls
• Use appropriate flashings and waterproofing
• Allow for independent movement where required
• Avoid assumptions about what’s behind the wall
If attachment details aren’t clear, it’s a strong signal to pause and reassess before proceeding.
Mistake 9: Building Without Thinking About Future Add-Ons
Many pergolas start simple — then evolve.
Future changes DIYers forget to plan for
• Outdoor blinds or screens
• Ceiling fans or lighting
• Heaters or electrical runs
• Privacy panels or shade extensions
Why early planning helps
• Structural allowance can be built in
• Wiring paths can be left accessible
• Load considerations can be accounted for
• Visual symmetry is easier to maintain
Even if upgrades aren’t immediate, planning for them avoids rework later.
Mistake 10: Assuming All Pergola Kits Are the Same
DIYers often compare kits purely on size and price, without understanding differences in design quality and adaptability.
Key differences between kits
• Engineering assumptions
• Material thickness and finish
• Flexibility of layouts
• Compatibility with Australian conditions
Choosing high-quality pergola kit options that align with your site and climate reduces the likelihood of compromises during installation.
Quick DIY Checkpoints Before You Start
Before committing to your build, confirm the following:
• Final layout works with furniture and walkways
• The footprint is square and level
• Post spacing matches material capabilities
• Roof choice suits sun, heat, and rainfall
• Fixings are appropriate for the environment
• Wind exposure has been considered
• Attachment details (if applicable) are understood
These checks alone prevent most DIY pergola kit issues.
When DIY Might Not Be the Best Option
DIY pergola kits suit many homeowners, but there are moments where extra expertise can save time and stress.
Consider additional advice if:
• Your site slopes significantly
• You’re close to boundaries or easements
• The pergola is unusually large or tall
• Wind exposure is high
• Attachment points are unclear
Pausing at the right moment often avoids expensive corrections later.
Frequently Asked Questions
How big should a pergola be for outdoor dining?
Allow space for the table, chairs pulled out, and at least 900mm clearance around the dining area for movement.
How far apart should pergola posts be?
This depends on material, beam size, and roof type. Aluminium typically allows wider spacing than timber, but always follow kit specifications.
Is polycarbonate roofing too hot in Australia?
Clear sheets can trap significant heat. Tinted or opaque options usually perform better in full sun areas.
Can I build a pergola on an existing slab?
Yes, if the slab thickness, condition, and reinforcement are suitable. Fixing type is critical.
What’s the most common DIY pergola mistake?
Poor planning — especially around sizing, squareness, and material suitability — causes the majority of long-term issues.
Final Thoughts
DIY pergola kits can deliver excellent results when they’re planned properly. Most mistakes aren’t about tools or skill — they’re about decisions made too early or too quickly.
By taking the time to get sizing, materials, and layout right before you start, you dramatically improve the outcome — and end up with a pergola that feels intentional, comfortable, and built to last in Australian conditions.