Blog
Common Problems With Outdoor Shade Structures in Australia (Rust, Rot, Loose Fixings) and What to Do First
Outdoor shade structures in Australia live a tough life: harsh UV, sudden downpours, salty coastal air, strong winds, and big temperature swings that make materials expand and contract. That’s why even a well-built setup can develop issues over time. If your pergolas (or any covered outdoor area) is starting to show rust stains, soft timber, or wobbly connections, the key is to triage it properly before a “small” problem turns into a safety risk.
This guide walks you through the most common failure points, what to check first, what you can safely do right now, and when it’s time to stop and get a qualified set of eyes on it.
What to do first: a quick safety triage
Before you grab a spanner or a pressure washer, do a fast safety scan. You’re looking for signs the structure might be compromised.
Stop using the area and make it safe if you notice any of these
• A post that visibly leans more than it used to, or suddenly looks “out of plumb”
• Significant wobble or sway when you lightly push a post or beam
• A beam that’s sagging, bowing, or appears to be pulling away from a connection
• Large cracks at connection points (especially around bolts, brackets, or plates)
• Brackets that are tearing, bending, or separating from the structure
• Fixings that are missing, snapped, or heavily corroded (flaky, pitted, swollen)
• A roof sheet/panel that’s lifting, rattling, or visibly loose in the wind
If any of those show up, treat it as a safety issue first. Keep kids off it, move furniture away, and avoid loading it with hanging chairs, swings, heaters, or plants until it’s checked properly.
If it looks stable, start with this “three-point check”
- Connections: Are bolts/screws/brackets tight, straight, and seated properly?
- Bases: Are posts solid at ground level with no movement or rot/corrosion?
- Water paths: Where does rain go, and is it getting trapped anywhere it shouldn’t?
Problem 1: Rust and corrosion (especially near the coast)
Rust doesn’t always mean the structure is failing, but it’s never something to ignore—because corrosion can accelerate quickly once coatings are breached.
What rust usually looks like in real life
• Orange/brown streaks running down from bolt heads or brackets
• Bubbling paint, flaking coating, or “powdery” residue on metal surfaces
• Pitting (small craters) on brackets or fasteners
• Rust that keeps returning soon after cleaning
• Corrosion concentrated where water sits: ledges, joints, lap seams, and around washers
Common causes in Australian conditions
• Coastal salt exposure: Salt-laden air speeds up corrosion dramatically.
• Water trap zones: Leaves and debris hold moisture against metal.
• Dissimilar metals: Certain metal combinations can trigger galvanic corrosion.
• Cut edges and drilled holes: Coatings are most vulnerable where metal is exposed.
• Wrong fastener grade for exposure: Some fasteners simply aren’t suitable long-term in harsh environments.
What to do first (safe, practical steps)
• Dry clean first: Brush off dirt/salt and remove leaf litter from joints and ledges.
• Rinse with fresh water: Especially if you’re near the coast—gentle rinse beats letting salt sit.
• Inspect the fasteners: Look for pitting, swelling, or “necking” where bolts thin out.
• Check bracket faces: If the bracket is deforming or thinning, that’s more serious than surface staining.
What not to do
• Don’t aggressively grind metal without understanding what coating system is there.
• Don’t mix random replacement screws/bolts “because they fit”. Mismatched fasteners can make corrosion worse.
• Don’t seal over active rust and hope for the best—corrosion usually keeps working underneath.
Q&A: Is a little rust on outdoor fixings dangerous?
It depends on where it is and what it’s doing. Surface staining on an exposed bolt head might be cosmetic. But pitting, swelling, flaking, or rust coming from a structural bracket can reduce strength over time. If rust is concentrated at a key connection (beam-to-post, base plates, roof supports), treat it as a priority inspection item.
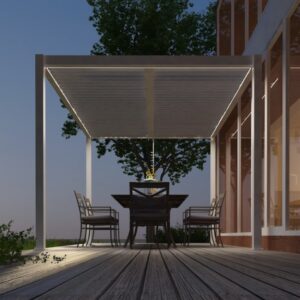
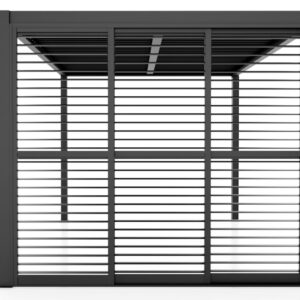
If you’re thinking longer-term about materials and durability, it can help to explore high-quality pergola kits so you can compare design approaches, finishes, and connection details that reduce corrosion traps.
A reliable reference point
If you want a straightforward overview of approvals and planning considerations (including common rules and when you may need to check further), the NSW Planning Portal has guidance on pergolas.
Problem 2: Timber rot and soft spots
Rot is usually a moisture-management problem first, and a timber problem second. In Australia, timber can cope with heavy rain events followed by intense heat—perfect conditions for moisture cycling, cracking, and then water ingress.
Early warning signs of rot (before it becomes obvious)
• Paint that’s peeling in small patches, especially near joints
• Timber that feels “spongy” when you press with a screwdriver tip (don’t gouge it—just a gentle probe)
• Dark staining at the base of posts or under horizontal members
• Fine fungal growth or persistent damp smell after rain
• Gaps are opening at the joints where water can enter and sit
The most common rot locations
• Post bases: Where timber meets the ground, paving, garden beds, or trapped mulch
• End grain: The cut ends of timber are like straws—moisture can wick in
• Horizontal ledges: Anywhere water sits, especially under cap boards
• Shaded, low-airflow zones: Moisture stays longer where the sun and breeze don’t reach
What to do first
• Find the moisture source: Look for sprinklers hitting the same area, downpipes overflowing, or garden beds trapping dampness against posts.
• Clear debris: Leaves and dirt against timber accelerate decay.
• Improve drying: Trim back plants and improve airflow around bases and joints.
• Check the “hidden” sides: Rot often starts on the side you don’t look at (behind screening, near fences, under roof edges).
What not to do
• Don’t just patch over soft timber with filler if the underlying moisture path isn’t fixed.
• Don’t trap moisture by sealing a damp area. Timber needs to be dry before sealing or painting.
Q&A: How can I tell the difference between normal weathering and rot?
Weathered timber can look grey, cracked, and rough, but still be structurally sound. Rot usually shows softness, crumbling fibres, deep staining, or a hollow sound when tapped. If you can press a tool into the surface easily, it’s no longer just cosmetic.
Problem 3: Loose fixings, wobble, and “structure movement”
Loose fixings are one of the most common homeowner concerns because they’re easy to notice: a rattle, a squeak, a visible gap, or a post that feels like it moves. Movement can be benign—or it can be an early sign of connection failure.
Why do things loosen over time
• Thermal movement: Hot days and cool nights cause repeated expansion/contraction.
• Wind cycles: Even without storms, the ongoing wind load can work fixings loose.
• Settlement: Soil movement or slab edge movement can change loads at the base.
• Vibration: Doors, gates, and attached screens can transmit vibration into a frame.
• Moisture cycling (timber): Timber swells and shrinks; fixings can lose bite.
What to check first (in this order)
- Look for missing parts: A missing washer or screw can change how a connection behaves.
- Check for oval holes: If a bolt hole is elongating, tightening alone may not solve it.
- Inspect bracket shape: Bent or “smiling” brackets indicate load changes or fatigue.
- Check the base: If the post moves at the bottom, the issue is often at the base plate, anchors, or surrounding substrate.
Safe DIY actions (only if everything looks structurally intact)
• Tighten loose screws/bolts gently—don’t crank until something distorts.
• Replace obviously stripped screws with appropriate outdoor-rated equivalents (same type and size, where possible).
• Re-seat loose washers and ensure bolts sit flush.
• Remove rattling accessories that add load (hanging décor, heaters) until you’re confident it’s stable.
When tightening is NOT enough
• The connection loosens again within weeks
• You see cracking around the fixing point
• The bracket is bending, or the bolt hole is stretching
• The post base moves even slightly under hand pressure
• You can see uplift marks, separation lines, or shifting at anchors
Q&A: Should I use “stronger” screws or bigger bolts to fix the wobble?
Not automatically. Bigger fixings can create new problems (splitting timber, weakening metal around a hole, or changing the load path). If a connection is failing, the best fix is usually addressing the connection design, not just upsizing hardware.
Problem 4: Leaks, water ingress, and “mystery” drip lines
Even when the roof looks fine, water can travel in surprising ways—especially along screws, overlaps, and channels.
Common leak sources
• Overlaps between sheets/panels where sealants have aged
• Screw penetrations where washers have perished
• Gutters or channels blocked with leaves
• Flashing points where the roof meets a wall
• Low spots where water pools and then tracks inward
First checks that actually help
• Clean the roof line and gutters: Leaf litter causes overflow and backflow.
• Look for pooling: After rain, note where water sits longer than expected.
• Inspect screw washers: Perished washers are a classic drip culprit.
• Trace the path: The drip point isn’t always the entry point—water can run along members.
Australia-specific triggers: coastal vs inland troubleshooting
Australia isn’t one set of conditions.
Coastal and bayside homes
• Corrosion risk is higher and often faster
• Salt sits in crevices and around fasteners
• “Looks fine” can change quickly once coatings are breached
What helps most: regular fresh-water rinses, debris removal, and early replacement of compromised fasteners before they weaken brackets.
Inland and high-heat areas
• UV and heat cycling can accelerate coating breakdown and timber checking
• Expansion/contraction can loosen fixings gradually
What helps most: seasonal inspections (pre-summer), checking movement points, and maintaining protective finishes before they fail completely.
High rainfall and humid zones
• Rot, mould, and trapped moisture are the main enemies
What helps most: drainage pathways, airflow, keeping bases dry, and preventing leaf litter traps.
A practical inspection routine you can stick to
A quick routine beats a big panic repair.
Quarterly (every 3 months)
• Check key connections for any new gaps or movement
• Remove leaf litter from ledges, gutters, and around posts
• Rinse coastal structures with fresh water
• Look for early coating breakdown or bubbling
After any major wind or storm event
• Check roof fixings, uplift, rattles, and any new squeaks
• Inspect base plates and anchors for movement
• Look for new cracks around brackets and bolt holes
• Confirm drainage paths are clear (blocked gutters after storms are common)
Pre-summer (late spring)
• Check protective finishes before the harshest UV period
• Tighten any minor looseness that’s not structural
• Confirm shading accessories aren’t overloading the frame
Common homeowner scenarios (and what they usually mean)
“I can see rust streaks under a bolt head”
Often means water is sitting around the washer/bolt head or the protective finish is compromised. If the bolt looks smooth and not pitted, you may be dealing with early corrosion. If there’s pitting or flaking, it’s more urgent.
“My post feels solid, but the beam connection creaks”
Creaking can be normal movement—but it can also mean a connection is rubbing due to looseness. Look for shiny rub marks, widening gaps, or a bracket that isn’t sitting flush.
“The timber looks fine… except near the base”
Base rot is very common. It can start behind garden beds or where mulch stays wet. Focus on moisture management and airflow, then assess whether the timber is still structurally sound.
“It only leaks when the wind blows”
That often points to water being driven under overlaps or flashing rather than a simple “hole”. Blocked gutters and aged seals also show up more during wind-driven rain.
When to get a professional inspection
This isn’t about overreacting—it’s about recognising when the risk profile changes.
Get it checked if you notice
• Structural movement you can feel with your hands
• Any deformation (bent brackets, stretching holes, sagging members)
• Significant corrosion at load-bearing connections
• Soft timber at key load points (post bases, beam ends, major joints)
• Repeating issues that return shortly after you “fix” them
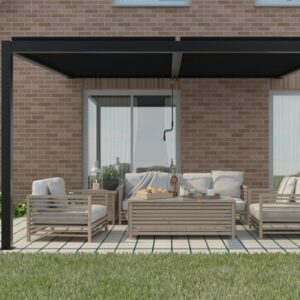
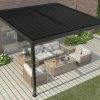
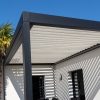
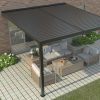
If you’re also thinking about improving comfort and usability long-term, you might like ideas on upgrading your outdoor living area with pergolas while keeping durability and maintenance in mind.
Bringing it back to comfort, shade, and long-term durability
The goal isn’t just “no problems”—it’s an outdoor area that stays comfortable and stable across Australian seasons. Many ongoing issues come down to three things:
• Water management (drainage and avoiding traps)
• Connection design (how loads transfer through brackets and fixings)
• Material suitability (especially for your exposure zone)
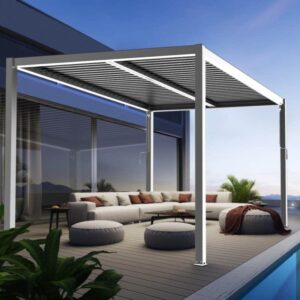
If you’re planning changes, extensions, or a new setup, it helps to start with the fundamentals: planning an outdoor shade area with pergolas can help you think through placement, exposure, and design choices that reduce common trouble spots.
FAQ
Why do outdoor bolts rust so quickly near the coast?
Salt accelerates corrosion and tends to collect in crevices around washers and brackets. Even small coating breaches can become bigger problems if debris and moisture sit in the same spot.
Is it OK to just paint over rust?
Painting over active rust rarely stops it for long. The best outcome usually comes from cleaning, treating, and restoring the protective system properly—especially around fasteners and joints.
What causes timber rot if the roof is covering it?
Rot often starts from ground moisture, splashback, trapped debris, or end-grain water absorption—areas a roof doesn’t necessarily protect.
How tight should outdoor fixings be?
Tight enough that the connection is seated and stable, but not so tight that you deform brackets, crush timber fibres, or strip threads. If tightening doesn’t hold, the problem may be connection wear or movement at the base.
What should I check after a big storm?
Prioritise roof fixings (uplift/rattle), then key brackets, then base plates and anchors. Also check gutters and drainage paths—storm debris can cause overflow that looks like a roof leak.
What’s the most overlooked maintenance task?
Clearing leaf litter and debris from joints, ledges, and gutters. Debris traps moisture and salt, speeding up both rot and corrosion.