Blog
Pergola Footings & Attaching to Your House: Getting the Structure Right

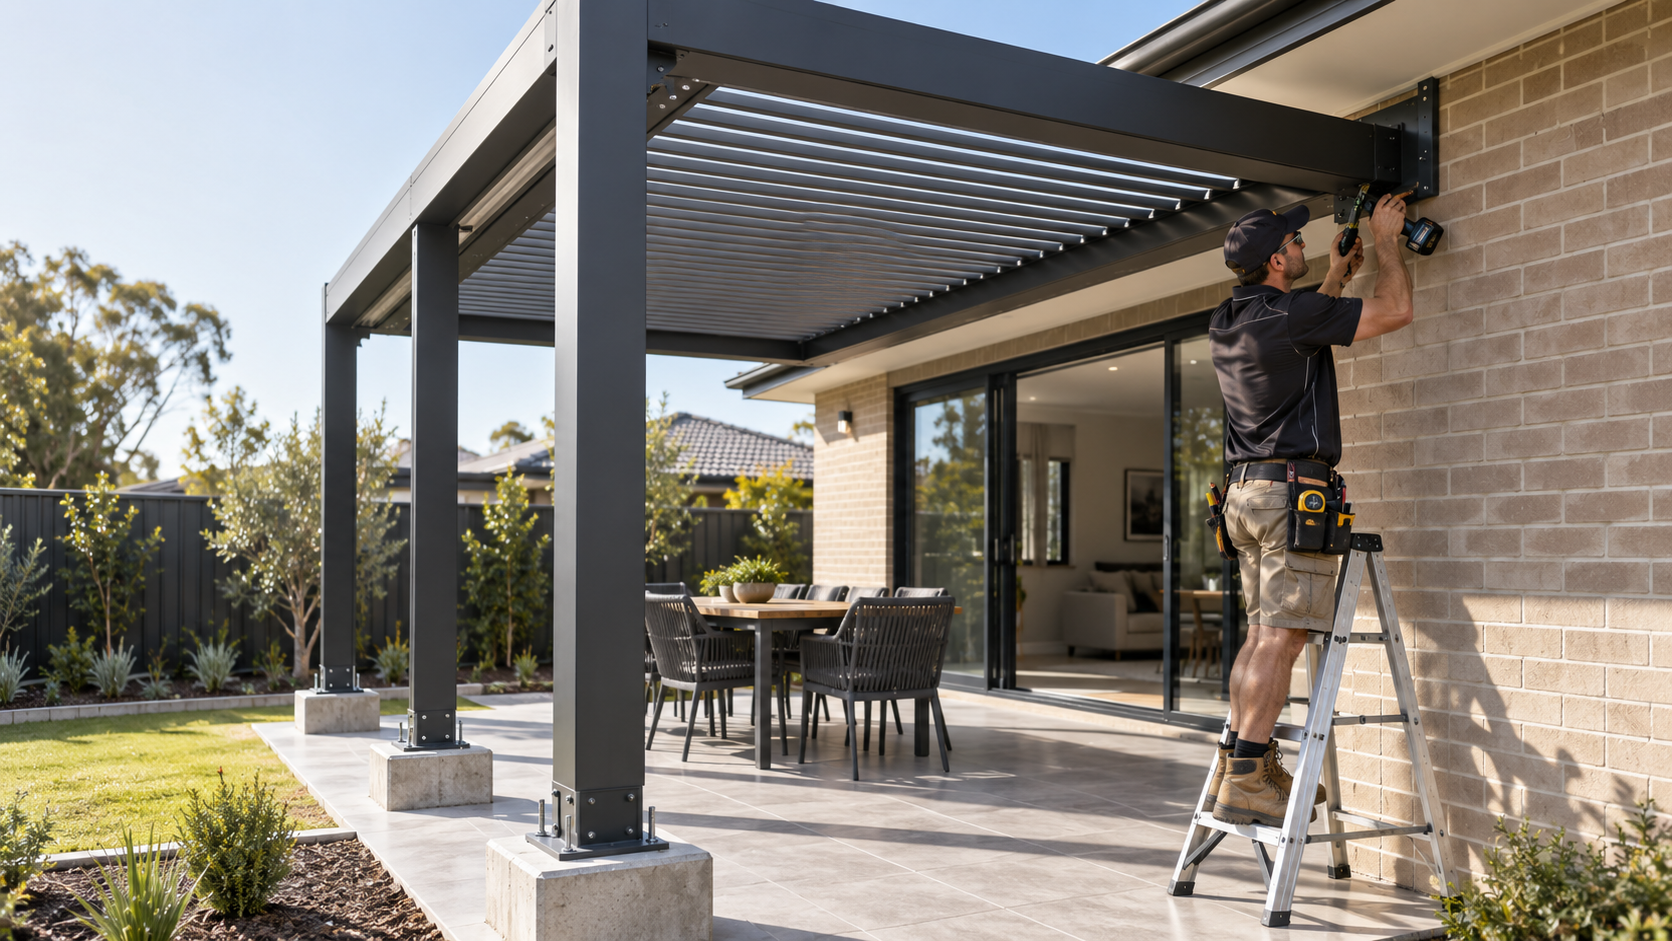
A pergola stays stable only when its roof loads are carried safely through the posts, connections and footings into the ground below. Beyond simply holding up the roof, the structure must resist gravity, wind uplift, lateral movement, and changing ground conditions over many years. If you plan to attach a pergola to your house, the stakes are higher again. Whoever builds it needs to find a genuinely suitable structural connection and prevent water from entering the existing building. Footing dimensions and attachment details are never one-size-fits-all. They shift with the soil, the pergola’s size and roof weight, wind exposure, post spacing, drainage, how the house itself is built, and local approval rules.
Pergola footings are below-ground or surface-mounted foundation elements that transfer the structure’s loads safely into stable ground. At the same time, an attached pergola also relies on engineered connections to send some of those loads into the house structure itself.
In This Guide
- Why Are the Right Pergola Footings Important?
- What Types of Footings Can Be Used for a Pergola?
- How Is a Pergola Safely Attached to a House?
- What Structural and Waterproofing Issues Should You Consider?
- When Should You Engage a Builder or Structural Engineer?
- What Approval Do You Need to Attach a Pergola to Your House?
- Getting the Structure Right Before You Build
- Frequently Asked Questions
Why Are the Right Pergola Footings Important?
Proper footings keep a pergola stable by transferring its weight and environmental loads to the ground, which can actually support them. Footings that are too small, too shallow, or sitting in disturbed soil can lead to movement, leaning, uplift and connection failure over time.
A pergola roof behaves like a sail in strong wind. Even a lightweight roof does not eliminate the need for substantial foundations, since wind uplift, not just the structure’s weight, can be the primary factor in footing design.
Footings carry the structure’s own weight and any rainwater or imposed loads, resist wind uplift and sideways movement, reduce settlement and rotation, keep timber posts away from persistent ground moisture, give post anchors a secure base, maintain roof falls for drainage, and protect the house connection from movement.
| Structural Force or Condition | What It Can Do | How the Footing Helps |
|---|---|---|
| Dead load | Pushes the structure downward | Spreads the weight into a suitable bearing material |
| Wind uplift | Tries to lift the roof and posts | Provides mass and anchorage against uplift |
| Lateral wind | Pushes the pergola sideways | Helps resist sliding and racking |
| Reactive soil movement | Shifts as moisture conditions change | A site-specific design reduces uneven movement |
| Soft or disturbed fill | Let’s posts settle | Footings may need to reach competent bearing material |
| Poor drainage | Softens soil and speeds deterioration | Correct siting and drainage limit persistent saturation |
Visible concrete is only part of the footing system. Reinforcement, embedment depth, anchors, concrete strength, soil bearing capacity, and drainage all affect how well it performs, which is why a footing that looks fine above ground can still be undersized below ground.
What Types of Footings Can Be Used for a Pergola?
Common pergola foundations include bored concrete piers, reinforced pad footings, post-anchor footings fixed to concrete, and engineered screw-pile systems. The right option depends on the soil, the loads involved, site access, and whether the posts are timber, steel or aluminium.
These generally fall into a few categories: bored concrete piers; reinforced pad or spread footings; concrete footings with galvanised post stirrups; screw piles or helical piles; footings tied into a new concrete slab; and engineered connections to an existing, structurally verified slab or footing.
The difference comes down to how the post actually meets the ground: embedding it directly in concrete, bolting it to an above-ground stirrup, fixing a post base onto an existing slab, or using a deep-foundation system such as screw piles. An existing paving slab is not automatically a suitable structural footing. Its thickness, reinforcement, condition, and edge distance must all be checked before you rely on it.
Pergola Footing Depth Reference Table
Use this table only as an early planning reference, not to select a construction depth.
| Site or Soil Condition | General Planning Expectation | Why a Fixed Depth Cannot Be Given | Required Verification |
|---|---|---|---|
| Firm, natural ground | Conventional concrete piers may be possible | Required depth changes with load, bearing capacity and wind exposure | Approved design or qualified professional assessment |
| Sand or loose granular soil | Wider or deeper foundations may be needed | Loose material can reduce bearing and lateral resistance | Soil assessment and structural design |
| Reactive clay | Footings may need to account for seasonal movement | Clay expands and contracts as moisture changes | Soil classification and engineered footing details |
| Filled or disturbed ground | Footings may need to extend through the fill | Fill depth and compaction are often uncertain | Site investigation or geotechnical advice |
| Sloping site | Pier depth and lateral restraint may increase | Slope stability, erosion and uneven ground affect performance | Engineer and, where needed, geotechnical advice |
| Coastal or exposed site | Uplift resistance and corrosion protection matter more | Wind classification and salt exposure vary widely between sites | Structural design and compatible materials |
| Near drains, retaining walls or excavations | Standard footing assumptions may not apply | Nearby structures and trenches can affect bearing support | Engineer or building professional review |
| Existing concrete slab | Direct fixing may be possible only if the slab is structurally adequate | Patio slabs are often too thin or poorly reinforced | Confirm slab specifications and anchor design |
Important: this table must not be used to select a construction depth. There is no universally safe pergola footing depth based solely on a broad soil description. Final diameter, depth, reinforcement, and anchorage should be taken from approved plans, engineering details, or the pergola manufacturer’s certified requirements.
Formal soil classification and footing design in Australia is generally based on AS 2870, the residential slabs and footings standard, which, as the Queensland Building and Construction Commission’s guide to preventing structural damage explains, groups sites from stable sand and rock through to highly reactive clay. A homeowner cannot reliably classify soil by eye; CSIRO’s foundation maintenance and footing performance guide explains why professional classification and design matter, particularly on reactive clay.
How Is a Pergola Safely Attached to a House?
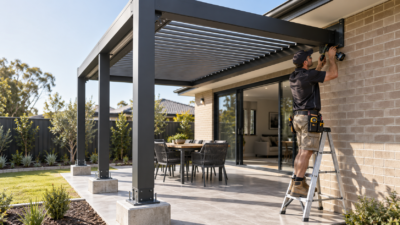
A pergola should only be attached to a house through connections that transfer loads into suitable structural framing, masonry or another verified load-bearing element. Gutters, fascia covers, cladding and unsupported brick veneer are not primary structural supports and should never be treated as such.
The correct connection details depend on how the house is actually built: timber or steel framing, structural masonry, brick veneer, concrete construction, exposed rafters or trusses, and the type of eaves, fascia, and roofing involved.
At a high level, the process involves:
- Confirming the pergola’s dimensions, roof material and expected loads.
- Inspecting the house construction to locate the structural members.
- Checking whether the connection affects roof drainage, eaves or services.
- Getting engineering details where the load path is uncertain.
- Installing the specified ledger, brackets, beams and fixings.
- Fitting flashing and weather seals, rather than relying on sealant alone.
- Testing drainage and inspecting the finished connection.
| Possible Connection Location | General Suitability | Main Consideration |
|---|---|---|
| Structural wall framing | Potentially suitable, correctly detailed | Studs, plates and fixing capacity must be confirmed |
| Structural masonry | Potentially suitable with specified anchors | Masonry condition and anchor design matter |
| Brick veneer | Not normally suitable alone | The veneer is generally a cladding skin, not the primary frame |
| Roof rafters or trusses | May be suitable with engineered details | Existing members must not be cut, overloaded or weakened |
| Fascia board | Should not be assumed to carry loads | Many fascia systems are not designed as structural supports |
| Gutter or cladding | Unsuitable as structural support | These are drainage or cladding components, not framing |
| Existing slab | Only suitable if the structural capacity is confirmed | Thickness, reinforcement and edge distances matter |
Never rely on a generic ledger bolt pattern found online. Fastener type, diameter, embedment, spacing and corrosion resistance all need to suit the actual substrate and calculated loads for your project.
What Structural and Waterproofing Issues Should You Consider?
The main risks are an incomplete load path, wind uplift, incompatible materials, inadequate drainage, and water entering through the new house connection. These issues need to be solved at the design stage, not concealed later with extra fixings or a bead of sealant.
Structural factors worth checking include the pergola’s span and projection, roof and framing weight, post spacing, wind exposure, uplift at the roof and footing connections, lateral bracing, the existing house frame’s capacity, movement between the pergola and house, corrosion-compatible fasteners, termite inspection zones, and proximity to boundaries, easements and services.
Waterproofing factors include roof pitch and fall, flashing and counter-flashing design, the existing wall cladding or masonry, weep holes and cavity drainage, gutter capacity, downpipe location, overflow paths, and how well the drainage carries water away from the footings themselves.
| Issue | Possible Consequence | Appropriate Response |
|---|---|---|
| Fixing only to the fascia | Connection movement or failure | Locate and connect to verified structural members |
| Loading brick veneer | Cracking or connection failure | Transfer loads to the structural frame using an approved detail |
| Inadequate roof fall | Ponding, overflow or early deterioration | Design the gradient and drainage before fabrication |
| Reliance on surface sealant | Leaks as the sealant ages | Use properly designed flashing with compatible seals |
| Blocking wall weep holes | Trapped moisture in the cavity | Preserve the required drainage and ventilation paths |
| Undersized guttering | Overflow against walls and openings | Calculate the roof catchment and provide a suitable discharge |
| Dissimilar metals in contact | Accelerated corrosion | Specify compatible metals, coatings or isolation |
Before construction, confirm that the house structure has been positively identified, that there is a continuous load path from roof to ground, that wind uplift and lateral loads have been considered, that footing dimensions appear on approved or engineered drawings, that underground services have been located, that an existing slab (if used) is confirmed suitable for structural anchors, that the roof has sufficient fall with gutters and overflow paths included, that flashing directs water onto the outer roof surface, that wall cavities and weep holes stay protected, and that any planning, strata or heritage requirements have been checked.
When Should You Engage a Builder or Structural Engineer?
Professional advice is worth seeking whenever the footing design, house connection, or approval pathway cannot be confirmed through certified documentation. Attached, roofed, large, exposed or site-constrained pergolas are the ones most likely to need qualified input.
Engage a structural engineer when the pergola will connect to an existing house, the supporting wall or roof structure is unclear, the home uses brick veneer, the design has long spans or few posts, the site has reactive soil, fill or a significant slope, the location is high-wind or exposed, footings will sit near retaining walls, pools, drains or boundaries, or existing concrete is proposed as the foundation.
Engage a licensed builder or specialist installer when structural framing must be altered; roof tiles, cladding, eaves, or wall membranes must be opened; complex flashing must be formed; the project requires several licensed trades; access or excavation presents safety risks; or your warranty or certification depends on authorised installation.
| Task | Appropriate Person |
|---|---|
| Confirm the planning pathway | Council, planning professional or certifier |
| Classify difficult soil conditions | Geotechnical professional |
| Design footings and house connections | Structural engineer or other suitably qualified designer |
| Confirm an existing slab’s structural adequacy | Structural engineer |
| Complete building work | Appropriately licensed builder or authorised owner-builder |
| Complete electrical work | Licensed electrician |
Check a licence with the relevant state regulator before any contract is signed. In NSW, you can check a builder or tradesperson’s licence through Service NSW, and in Victoria, Energy Safe Victoria licenses electrical workers; every other state and territory has its own equivalent body.
What Approval Do You Need to Attach a Pergola to Your House?
An attached pergola may be exempt development, complying development, or work needing a full development application, depending on your state, council and the specific proposal. Attaching it to the house does not automatically make the work exempt, nor does it automatically trigger approval.
Approval status can be affected by the total area, height, and setbacks; the pergola’s position relative to the building line; heritage controls; bushfire- or flood-prone land; easements; the structural work and roof drainage involved; the fact that it attaches to an existing building; and any strata or community title rules.
In NSW, the Codes SEPP exempt development provisions state that a structure qualifies as exempt only when all applicable standards, including size and siting rules, are met. Every other state and territory sets its own thresholds, so treat this as one example rather than a national rule. Our state-by-state guide to pergola council approval in Australia covers the details for every state and territory.
Getting the Structure Right Before You Build
Getting the footings and house connection right is what actually determines whether a pergola stands up to Australian wind and weather over the long term, not just how it looks on installation day. Before you attach a pergola to your house, confirm the soil conditions, the footing system, the structural connection and the drainage design against approved plans or a qualified professional’s advice, rather than a generic figure found online. That upfront step is what avoids costly rework, movement and leaks later.
A site assessment can confirm the footing requirements, structural connection and weatherproofing details for your specific property, helping you build with confidence rather than guessing. Our guide to what to expect during pergola installation covers the process from first measurements through to handover.
Frequently Asked Questions
How Deep Should Pergola Footings Be?
There is no universal pergola footing depth. Required depth and width depend on soil bearing capacity, soil movement, wind exposure, the pergola’s size, roof type, post spacing and the footing system used. Generic figures found online should only ever be treated as a preliminary reference. The final dimensions should come from approved drawings, certified manufacturer details, or a structural engineer’s assessment once your site’s soil classification has been properly checked.
Can Pergola Posts Be Installed Directly Into the Ground?
Some systems allow embedded posts, but direct ground contact can expose timber or metal to moisture, decay and corrosion over time. Above-ground galvanised or stainless-steel post supports are often used instead to keep posts above persistent moisture, though they still require correctly designed footings and connections beneath them. Whether direct embedment suits your project depends on the post material, its treatment level, the soil, drainage and the approved construction detail for your kit.
Can a Pergola Be Attached to Brick Veneer?
Brick veneer should not normally be assumed to carry pergola loads, as it typically serves as an external cladding rather than the home’s primary structural frame. A suitable connection detail transfers loads through or past the veneer to the verified structural framing behind it instead. Because a poorly detailed fixing can crack the masonry, bridge the wall cavity or create a leak, this connection should be designed or confirmed by a qualified professional before work starts.
Do You Need Approval to Attach a Pergola to Your House?
It depends on your state, council, property and design. Some pergolas satisfy exempt development conditions, while others need a complying development or a full development application. Attaching a pergola to the house does not automatically make the work exempt, nor does it automatically require approval. Heritage, bushfire, strata, boundary and drainage rules can all affect the outcome, so confirm the pathway with your council or a certifier before ordering materials or excavating.
How Can You Prevent Leaks Where a Pergola Meets the House?
Durable weatherproofing generally needs properly designed flashing, the right roof fall, adequate gutters and downpipes, compatible materials, and a clear drainage path away from the junction. Sealant should support a properly detailed connection rather than serve as the sole waterproofing layer, since it will eventually age and fail on its own. Flashing needs to suit the specific wall, roof and cavity construction without blocking weep holes. Arrange a professional inspection after major storms or if you notice any seal deterioration.