Blog

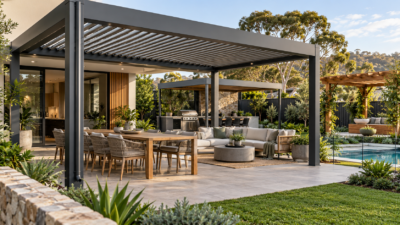
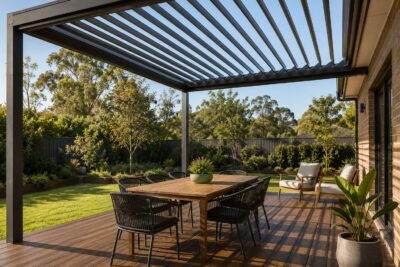
Aluminium pergola kits Australia-wide typically bundle the posts, beams, roof components, and fixings required for a specific design into a single package. A DIY pergola kit can simplify product selection and reduce design costs compared with a fully custom build. Still, the advertised price often does not include footings, council approval, delivery, electrical work, or installation. Whether an affordable pergola kit is the right choice for you depends on the kit itself, your site, your own building skills, how much help you have, and any approval requirements that apply to your property.
A pergola kit is a packaged set of posts, beams, roof components, fixings and instructions designed to create a specified pergola configuration. Kits may be standard-sized, configurable within set options, or fully custom-manufactured for a particular site.
In This Guide
- What Is Included in a DIY Pergola Kit?
- What Are the Benefits of Aluminium Pergola Kits?
- How Much Do DIY and Aluminium Pergola Kits Cost?
- How Do DIY Pergola Kits Compare With Professional Installation?
- What Should You Check Before Buying a Pergola Kit?
- Frequently Asked Questions
- Aluminium Pergola Kits Australia: Making the Right Call
What Is Included in a DIY Pergola Kit?
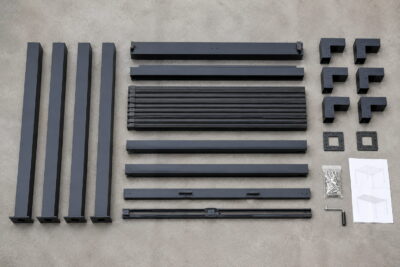
A typical DIY pergola kit contains posts, main beams, rafters or louvres, brackets, fasteners and roof components, along with an installation manual. Footings, a concrete slab, tools and installation labour are frequently sold separately, so check the exact inclusions before comparing prices.
The main parts of a pergola kit generally include:
- Posts, main beams and rafters or battens
- Roof sheets, panels or adjustable louvres
- Perimeter frame and post brackets or stirrups
- Wall connection or ledger components, on attached kits
- Bracing, bolts, screws and fasteners
- Flashing, gutters and downpipes
- Motor and controls, on motorised systems
- Installation instructions and engineering documents were supplied.
| Component or Service | Included in a Standard Kit? | What to Confirm |
|---|---|---|
| Posts, beams and roof frame | Yes | Dimensions and finish |
| Roof sheets or louvres | Product dependent | Material and coverage |
| Brackets and standard fixings | Usually | Substrate compatibility |
| Gutters and downpipes | Product dependent | Capacity and outlets |
| Flashing for the house connection | Product dependent | House connection details |
| Footings and concrete | No | Excavation and quantity |
| Engineering documents | Product dependent | Site-specific or generic |
| Council or certifier fees | No | Approval pathway for your site |
| Delivery | Product dependent | Unloading and site access |
| Installation labour | No | Full or assisted install |
| Electrical work | No | Motor, lighting and controls |
| Warranty | Usually | Supply-only exclusions |
Standard Versus Custom Kit
| Feature | Standard Kit | Configurable Kit | Custom Pergola |
|---|---|---|---|
| Dimensions | Predetermined | Selected from set options | Designed for the site |
| Roof choices | Limited | Several options | Project-specific |
| Lead time | Usually shorter | Medium | Longer |
| Price | Lower | Medium | Higher |
| Site flexibility | Limited | Moderate | High |
Modifying a kit outside its documented configuration can invalidate its engineering or warranty cover. If you are torn between the two, our comparison of custom pergolas and fixed-size kits outlines how most homeowners make their decision.
What Are the Benefits of Aluminium Pergola Kits?
Aluminium pergola kits offer consistent, factory-made components, resistance to rot and termites, and relatively low routine maintenance compared with untreated timber. They still need a structural design suited to the site and correct installation, so the material alone does not guarantee a trouble-free result.
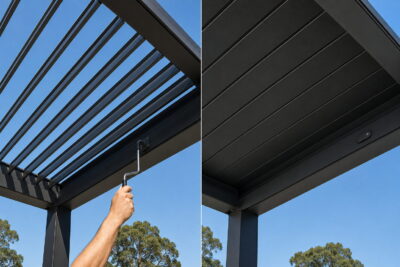
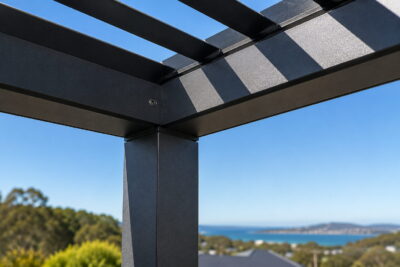
Benefits typically include resistance to rot and termite damage, a relatively light but strong frame, powder-coated finishes in several colours, compatibility with fixed and louvred roofs, and pre-cut components that reduce on-site fabrication. Unique Pergolas’ own kits, for example, ship with precision-cut components and step-by-step instructions.
Limitations to keep in mind: coatings can be damaged, allowing corrosion to start; a standard kit may not fit an unusual site; long components still need careful, safe lifting; cutting or modifying parts can affect the warranty; and aluminium still needs regular cleaning and periodic inspection.
| Material | Main Benefit | Maintenance | Key Limitation |
|---|---|---|---|
| Aluminium | Lightweight, rot-resistant and consistent | Low to medium | Needs careful fixing and coating protection |
| Timber | Natural appearance, easy to cut on site | Medium to high | Treatment, painting and movement |
| Steel | Strength and span capability | Medium | Weight and corrosion protection |
| Composite | Product-specific durability | Product dependent | Limited structural options |
No aluminium system should be described as maintenance-free, rust-proof or suitable for every coastal exposure.
Coastal Suitability
Coastal performance depends on the aluminium grade, pre-treatment, powder-coating system, cut-edge protection and fastener material, not on the base metal alone. Ask your supplier for written confirmation that the complete system, not just the frame, suits your property’s exposure category before you order. Our guide to aluminium pergolas for Australian conditions covers this in more detail.
How Much Do DIY and Aluminium Pergola Kits Cost?
Kit costs depend on size, material, roof style, engineering, delivery and whether professional installation is included. As a current, verified example, Unique Pergolas prices its DIY aluminium kits as follows on the pergola range, all supply-only unless stated:
| Pergola Option | Typical Price (Supply Only, DIY) | Notes |
|---|---|---|
| Manual louvred pergola kit | $3,999 – $8,999 | Freestanding or wall-mounted, fixed at 2.5 m roof height |
| Motorised louvred pergola kit | $6,299 – $10,999 | Freestanding or wall-mounted, remote-controlled |
| Freestanding motorised pergola (flagship range) | Around $18,999 | 6 m x 4 m, app control, integrated LED lighting |
| Screens, glass doors and wall panels | From around $525 | Priced separately from the pergola itself |
These prices exclude a concrete slab, new footings, electrical connection for motorised models, and professional installation. Prices and inclusions change, so check the current pergola range before budgeting. A custom-designed, professionally installed pergola falls within a much wider, generally higher range, since design, engineering, and labour are quoted individually. Our pergola cost guide for Australia covers that comparison in more depth.
Complete Project Budget
| Cost Category | Usually, in the Kit Price? |
|---|---|
| Pergola components | Usually |
| Delivery | Sometimes |
| Council or certifier fees | Usually not |
| Engineering | Sometimes |
| Footings | Usually not |
| Concrete slab | Usually not |
| Tools and lifting equipment | No |
| Installer labour | No, for supply-only kits |
| Electrical work | No |
| Screens and accessories | Usually optional |
All prices are indicative. Compare the complete installed project cost, not just the advertised kit price, before deciding between a kit and a custom build.
How Do DIY Pergola Kits Compare With Professional Installation?
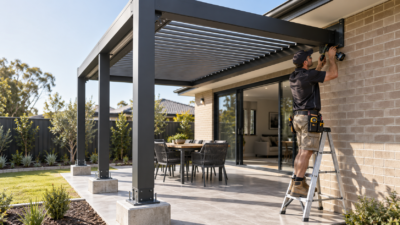
DIY installation can reduce labour costs for a confident homeowner working with a kit designed for owner assembly on a straightforward site. Professional installation is generally the safer choice where structural house connections, difficult access, motorised components, or working at height beyond a simple ladder are involved.
| Consideration | DIY Installation | Professional Installation |
|---|---|---|
| Labour cost | Lower | Higher |
| Structural responsibility | Owner’s | Contractor’s, within scope |
| Tools and lifting | The owner supplies or hires | Usually supplied |
| House attachment | High-risk DIY area | Professionally assessed |
| Electrical work | Licensed electrician still required | Coordinated by the installer |
| Warranty | May exclude self-installation | Workmanship warranty may apply |
| Error risk | Higher without experience | Lower with a suitable installer |
Honest DIY Feasibility Checklist
DIY may suit you when the kit is specifically designed for owner installation, the site is level, accessible and freestanding, site-specific engineering and footing details are supplied, you can accurately set out levels and square corners, several capable adults can help with lifting, no structural change to the house is needed, licensed trades will still handle any electrical work, and you understand the approval requirements for your property.
Get professional help when the pergola attaches to the house, the system is motorised, the site is sloping or hard to access, rock or complex excavation is expected, the build is beside a pool or over a deck, you cannot safely work at height, or your warranty conditions require approved installation.
Beyond following the manual, a DIY installer needs to set out accurate dimensions and levels, install footings and framing correctly, maintain roof fall and seals, and protect the aluminium finish while lifting long components. Falls from height are a major cause of injury in Australia, so plan safe access and get help with heavy lifting rather than working alone from a single ladder; see Safe Work Australia’s guidance on working at height. Our guide to what to expect during pergola installation walks through the process in more detail.
What Should You Check Before Buying a Pergola Kit?
Before ordering, confirm dimensions, wind suitability, engineering, roof type, footing requirements, delivery, installation responsibility and warranty conditions. A kit that looks affordable on the shelf can cost more once every site requirement is added.
Size and structure: overall width, projection and post positions; frame height and beam depth; door and window clearance; attached or freestanding configuration; wind classification and maximum spans; footing details and house attachment method, where relevant.
Inclusions: posts, beams, roof panels or louvres, brackets, fasteners, flashing, gutters, downpipes, motor and controls, installation manual, engineering documents, delivery and warranty.
Site conditions: existing slab, pavers, deck or soil; slope and drainage; underground services; coastal exposure; bushfire requirements; pool barriers; council and strata rules.
Supplier support: whether the kit is designed for DIY installation, what phone or video support is available, whether components are labelled and pre-drilled, what voids the warranty, and who provides engineering advice or handles freight damage.
| Buyer Situation | Recommended Starting Option | Key Consideration |
|---|---|---|
| Skilled DIY buyer, simple site | Standard freestanding kit | Verify engineering and footings |
| First-time renovator | Professionally installed kit | Reduces structural and assembly risk |
| Existing concrete slab | Site assessment first | Slab may not suit new footings |
| Paved area | Kit with independent footings | Pavers need removal and reinstatement |
| Want to attach to the house | Professionally engineered installation | The House must support the connection |
| Coastal property | Exposure-suitable aluminium system | Coatings, fasteners and cleaning |
| Unusual dimensions | Custom pergola | A standard kit may not fit properly |
Attached Versus Freestanding Kits
| Consideration | Attached Kit | Freestanding Kit |
|---|---|---|
| Structural support | Partly connected to the house | Independent posts and footings |
| Installation complexity | Higher | Often lower on a simple site |
| Waterproofing | The house junction must be detailed | Managed independently |
| DIY suitability | Lower | Potentially higher |
Our guide to wall-mounted pergolas for small spaces and courtyards covers attached designs in more detail.
Concrete Slab, Pavers, Deck or Soil?
| Surface | Kit Installation Potential | What Must Be Checked |
|---|---|---|
| Purpose-built slab | Suitable in some cases | Thickness, reinforcement and engineering |
| Pavers | Suitable, with independent footings | Pavers are not a structural foundation |
| Timber or composite deck | Project dependent | Underlying framing, not just the surface |
| Bare soil | Suitable with designed footings | Excavation and drainage |
| Sloping site | Needs a custom assessment | Levels, retaining and access |
If you are weighing up a DIY pergola kit against a professionally built structure, browse the current range of aluminium pergola kits or get in touch with the team with your site details and questions.
Frequently Asked Questions
Do DIY Pergola Kits Require Council Approval?
It depends on your state, council, property and the kit’s design. In NSW, for example, a patio-type structure is generally not exempt development if it exceeds 25 square metres in area or 3 metres in height, sits closer than 900mm to a boundary, has an enclosing wall above 1.4m, or has a floor more than 1m above ground level. Rules differ in other states and territories. Size, height, setbacks, attachment to the house, heritage overlays, bushfire zones and strata rules can all affect the pathway. Our state-by-state guide to pergola council approval covers the details for every state and territory.
What Tools Are Needed to Install a Pergola Kit?
Required tools depend on the specific kit, the surface and the footing design, so follow the manufacturer’s manual rather than a generic list. Common equipment includes measuring, levelling, drilling, and fastening tools, as well as safe access and lifting assistance for longer components. Electrical work and any other licensed trade tasks must be completed by a qualified professional, not by following the assembly instructions.
Can a Pergola Kit Be Attached to an Existing House?
Some kits are designed for wall-mounted installation, but the existing house must still provide a suitable structural connection. Fascia boards, eaves, wall materials, flashing, and drainage all need to be assessed before you fix anything to the building. Do not attach a kit to a house unless the approved system instructions and engineering support that specific method.
How Long Does It Take to Assemble a DIY Pergola?
Assembly time depends on the kit’s size, the installer’s experience, footings, site preparation, available help and the weather. Unique Pergolas’ louvred kits are typically built by two to three adults in around three hours, but that covers assembly only. Allow extra time for accurate set-out, safety checks, concrete curing and any electrical work, which are usually separate from the advertised assembly time.
Are Aluminium Pergola Kits Suitable for Coastal Areas?
Suitable aluminium systems can perform well in coastal areas, but the complete specification matters more than the material alone. Check the aluminium grade, powder-coating system, fastener material, cut-edge protection, cleaning requirements and any warranty exclusions for coastal exposure before you buy. No aluminium pergola should be described as corrosion-proof or maintenance-free.
Aluminium Pergola Kits Australia: Making the Right Call
Choosing between a DIY aluminium pergola kit and a professionally installed or custom pergola comes down to your site, your own building skills, and how much of the total project cost you want to take on yourself. Aluminium pergola kits Australia-wide can be a genuinely affordable option for a straightforward, freestanding site, but attached, motorised, or difficult-access projects generally suit professional installation. Compare the complete project cost, not just the advertised kit price, before you decide.