Blog
Pergola Placement 101: Sun Angles, Breezes and Privacy for Australian Backyards
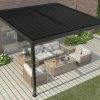
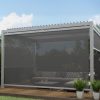
A pergola can look perfect on paper and still feel too hot, too windy, too exposed, or simply… unused — and that’s true whether you’re planning fixed designs or manual pergolas. In Australia, the difference usually comes down to placement.
Place it with the sun, breeze and neighbour sightlines in mind, and you’ll get an outdoor area that works across seasons—especially with manual pergolas, where placement can make a big difference to day-to-day comfort. Place it “where there’s space”, and you can end up chasing shade around the yard, squinting into glare, or sitting in a wind tunnel.
This guide breaks placement into three practical lenses you can check in any backyard:
• Sun angles (seasonal sun path + low-angle morning/afternoon sun)
• Breezes (cooling airflow vs gusty exposure)
• Privacy (sightlines, elevation changes, and screening that still breathes)
Along the way, you’ll also learn how size and orientation influence comfort, and how to avoid the most common layout mistakes.
Start with how you actually live outside
Before you think about compass directions, get clear on the “job” your pergola is meant to do. Placement is easier when you can answer these:
• Is it mainly for outdoor dining, lounging, or both?
• Will you use it more on weekdays (mornings/evenings) or weekends (midday)?
• Do you want winter sun for warmth, or maximum summer shade?
• Are you trying to shield a doorway, large sliding doors, or a kitchen servery?
• Do you need coverage over a path, barbecue zone, spa, or poolside seating?
Now, picture your most common use time. If you’re a late-afternoon family, west sun and neighbour sightlines matter more than early-morning light. If you’re a weekend brunch household, morning sun and breeze matter more than late-day glare.
A quick “comfort priority” list
Most Australian backyards benefit from prioritising these in order:
- Block harsh afternoon sun (often west/north-west)
- Keep airflow (so shade doesn’t become a heat box)
- Manage neighbour sightlines (without turning it into a bunker)
- Think about rain run-off and the ground underneath
- Make the layout feel connected to the house, not stranded
Sun angles in Australia: the simple version that saves you pain
In Australia, the sun tracks through the northern sky. That single idea explains why some outdoor areas feel pleasant in winter but brutal in summer, and why low-angle east/west sun causes more discomfort than people expect.
You don’t need to be a designer to use this. You just need to plan for two types of sun:
• High summer sun (overhead-ish, can be shaded more easily)
• Low-angle morning and afternoon sun (sneaks in sideways and causes glare/heat)
A pergola placed without considering low-angle sun can still be bright, hot and squinty, even if it looks “covered”.
Do the 3-time sun check (takes one day, saves years)
Pick a typical day and stand in your backyard at:
• 9:00 am
• 12:00 pm
• 4:00 pm
At each time, notice:
• Where the strongest sunlight hits (walls, paving, fence lines)
• Where shadows naturally fall (from the house, trees, neighbouring structures)
• Where you already instinctively stand or sit to feel comfortable
If you can, repeat this on a different season or at least think seasonally: winter sun is lower and more valuable for warmth; summer sun is higher and harsher, especially on hard surfaces like concrete and pavers.
Q&A: Is north-facing always best for a pergola in Australia?
Not always. North exposure can be brilliant if you want winter warmth and can manage summer heat with good shading and ventilation. But many households struggle more with low-angle afternoon sun (often from the west/north-west). If your yard cooks at 4–6 pm, prioritise protecting that time slot, even if it means your pergola isn’t perfectly “north-facing”.
Breezes: catch the cool, avoid the wind tunnel
Breeze is the most underrated comfort feature in outdoor living. Shade without airflow can still feel stifling, particularly in humid coastal areas or during still, hot days.
But the goal isn’t “more wind”. It’s controlled airflow.
Read your backyard’s breeze behaviour
Breezes aren’t uniform. They get redirected by:
• The side of the house (creates calm pockets and gusty corners)
• Solid fences (block wind, but can also push it down and around)
• Neighbouring buildings (channel wind through narrow gaps)
• Trees and hedges (filter wind, often in a gentler way)
Walk outside on a breezy day and notice:
• Where wind feels pleasant (cooling)
• Where it becomes annoying (papers blowing, hair/eyes, rattling)
• Where it accelerates (often along side passages or between structures)
As a general rule, pergolas feel best in spots where wind is present but softened, not where it’s forced through a narrow corridor.
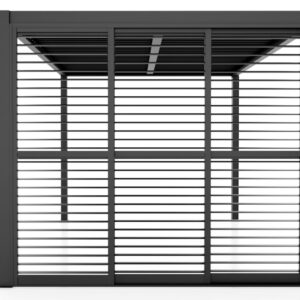
Use “filtered edges” instead of solid wind breaks
If you need wind protection, aim for screening that filters rather than blocks:
• Vertical battens with spacing
• Slatted screens
• Climbing plants on an open trellis
• Layered planting (low + mid + high), leaving gaps for air movement
This approach reduces gustiness while keeping airflow—especially helpful in summer.
Q&A: How do I get a breeze under a pergola without it feeling windy?
Start with placement: avoid the tight channel between a house wall and boundary fence if it’s a known wind tunnel. Then use partial, breathable screening on the windward side (the side the breeze comes from most often). Leave at least one side more open so air can move through rather than pressurising the space.
Privacy: fix sightlines, not just “exposure”
Privacy isn’t only about being seen. It’s about how often you feel watched, and from where.
Common Australian privacy challenges include:
• Neighbours on higher ground (you feel visible even in the centre of your yard)
• Two-storey windows looking down
• Narrow lots where side fences are close, and lines of sight are straight
• Corner blocks with angled viewing from the street
The three sightline checks
Stand (or sit) where you want the pergola seating to be. Now check:
- Street sightline: can pedestrians or cars see straight in?
- Neighbour window sightline: where are the main windows and balconies?
- Fence-line sightline: can a neighbour see through a gap down the side?
The goal is to position the pergola where you can solve privacy with light-touch screening, rather than needing to fully wall it in.
Privacy that still feels open
Good options that keep a relaxed outdoor vibe:
• Offsetting the pergola a little from the fence line so planting fits between
• Using angled screens (so you block direct sightlines without blocking all air)
• Creating a “private corner” seating zone under the pergola rather than centring seating
• Using greenery to soften and break up views (often more pleasant than solid panels)
If you want ideas that fit common Australian block sizes and lifestyles, you can see pergola styles for Aussie backyards and note how many designs solve privacy with partial screening rather than full enclosure.
Q&A: Should I place a pergola right on the boundary for privacy?
Sometimes it helps, but it can also backfire. Placing directly on a fence line can make the space feel narrow, reduce airflow, and limit planting options. A small offset can create room for greenery or a screen that filters views while keeping the area breathable. (Also, boundary proximity can involve local rules—if you’re unsure, treat it as a “check before you build” item.)
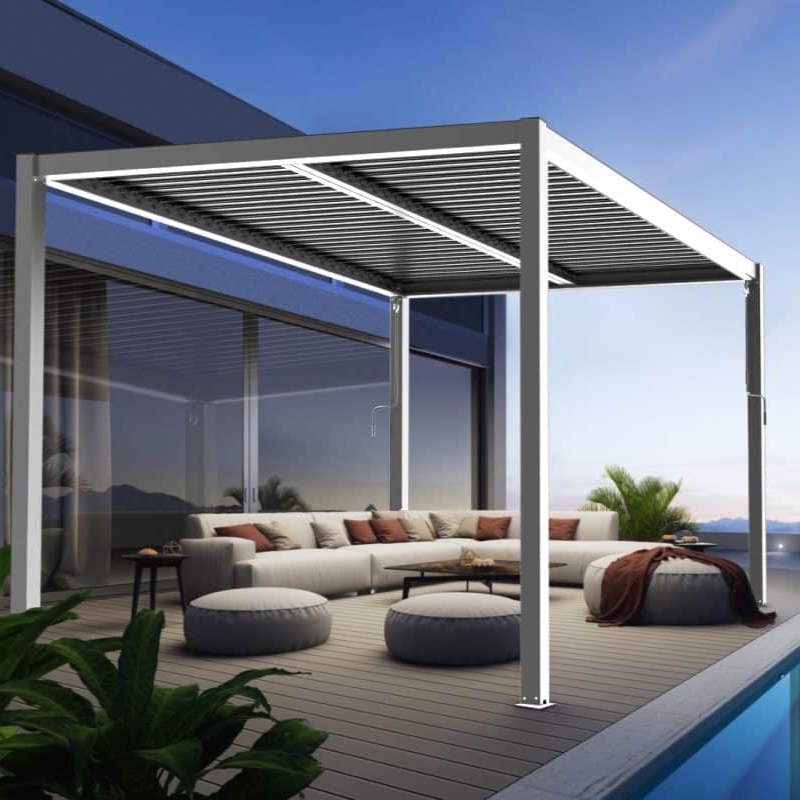
Attached vs freestanding: what placement changes
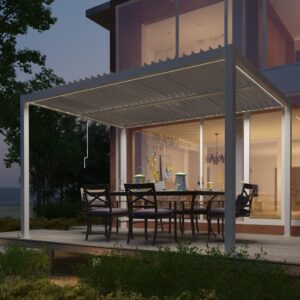
Both can work beautifully. What changes is how the space connects to your daily life.
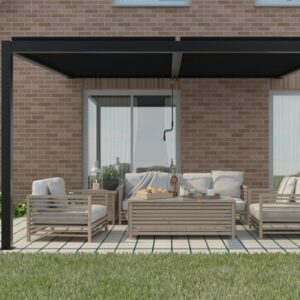
Attached pergolas: strongest “everyday use” link
Often best when:
• You want a seamless indoor–outdoor flow
• You’ll use it for dining near the kitchen
• You want shade over openings (sliding doors/windows)
Placement tip: watch for reflected heat. A pergola attached to a west-facing wall can still feel hot if the wall and paving store heat and radiate it later.
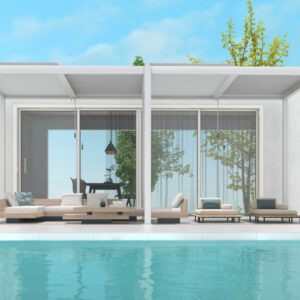
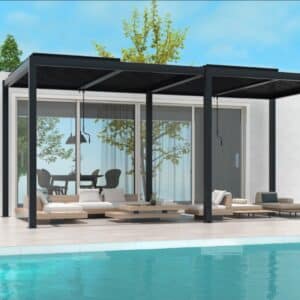
Freestanding pergolas: best for yard zoning and privacy control
Often best when:
• Your best breeze or view is away from the house
• You want a separate lounge zone or poolside shade
• You’re solving privacy by moving the space out of direct sightlines
Placement tip: don’t “island” it too far away unless you’ll genuinely walk there daily. A path, lighting, and visual connection (like aligning it with a doorway or garden edge) can make it feel like part of the home.
If your end goal is simply to make the backyard more livable (not just “add a structure”), start by mapping where you naturally gravitate on warm days and then plan a more comfortable outdoor area around that behaviour.
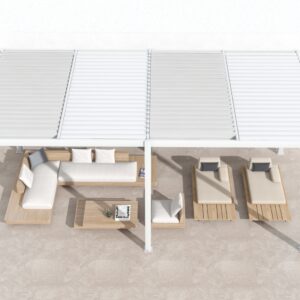
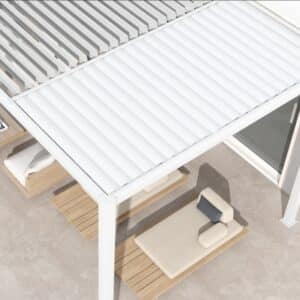
How pergola sizes impact shade and functionality
Size isn’t just about “how many people fit”. It directly changes:
• How much sun reaches the floor and seating
• Whether the space feels airy or cramped
• How flexible the layout is (dining + circulation + cooking zones)
• Whether privacy screening feels subtle or dominant
1) Bigger isn’t always cooler
A larger covered footprint can reduce direct sun, but if it blocks airflow and traps warm air near hard paving, it can still feel hot. The most comfortable spaces balance coverage with ventilation.
A useful mindset: aim for enough coverage where the main seating stays shaded at your peak use time, but not so enclosed that air can’t move.
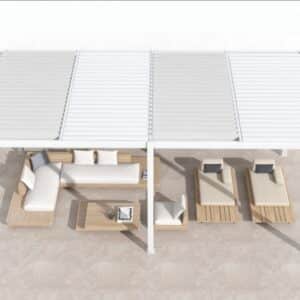
2) Size should match the “activity rectangle”
Think in zones:
• Dining zone: table + chairs + push-back space
• Lounge zone: seating + coffee table + walkways
• Cooking zone: barbecue bench clearance + safe circulation
• Transition zone: doors, steps, paths, pool access
If your pergola is too small, furniture ends up jammed to the edges (and people sit in sun stripes). If it’s too large in the wrong spot, it can dominate the yard and create dark corners you don’t use.
3) Shade moves—so plan for where the shade lands
A pergola that creates shade at midday might not protect you at 4 pm. The longer the afternoon shadow needs to be, the more you must pay attention to:
• The direction of the late sun
• Nearby reflective surfaces (pale paving can bounce heat/light)
• Whether screening is needed on one side to stop low-angle glare
If you’re deciding between two footprints, test it with a simple marker method: use stakes or a garden hose to outline each size on the ground, then revisit at different times of day and imagine furniture placement.
For more detail on sizing trade-offs (shade vs airflow vs layout flexibility), here’s a practical reference point: how do pergola sizes impact shade and functionality?
Q&A: What’s the most common sizing mistake?
Designing to the outer dimensions instead of the usable zone. People often forget chair push-back space, walkways, and where the sun will hit when you actually sit down. The result is a pergola that looks fine but forces furniture into sun patches or blocks natural movement through the yard.
A simple placement method you can use on any block
If you want a no-fuss way to narrow down the best spot, try this:
Step 1: Identify your “hot problem” time
Is it 7–9 am glare? Midday heat? 4–6 pm west sun? Pick the time that most often ruins your outdoor plans.
Step 2: Choose your main use zone
Dining near the kitchen? Lounging where it’s quiet? Poolside? Your placement will follow the use.
Step 3: Stand where you’d put the seating
Don’t stand in the middle and guess. Stand where your body will actually be: where chairs or lounges would sit.
Step 4: Check the sun and glare
Look for:
• Direct sun on your eyes/face
• Sun blasting a wall behind you (radiant heat later)
• Reflections off paving, pool water, or light-coloured surfaces
Step 5: Check breeze quality
Ask:
• Is it a pleasant cooling flow, or is it gusty?
• Does the house or fence create a wind tunnel effect?
• Could a partial screen soften it without blocking all air?
Step 6: Check sightlines
Sit down if possible. Eye level changes what you notice. Mark the angles where you feel exposed.
Step 7: Confirm ground and drainage realities
Even a perfect comfort spot needs practical support:
• Where will rainwater run?
• Will water pool underfoot?
• Is the ground stable enough for footings?
• Are there roots, pipes, or easements that change where you can build?
Common pergola placement mistakes Australians regret
Placing it where it looks symmetrical, not where it feels comfortable
The “centre of the yard” can be the most exposed point for sun and neighbours.
Ignoring low-angle afternoon sun
This is the big one. The area looks shaded at midday and unusable later.
Building in a wind corridor
Side passages and tight gaps can amplify wind. The structure doesn’t create calm; it creates turbulence.
Forgetting how heat is stored in surfaces
Concrete, pavers and dark decking can radiate heat well into the evening. Placement near large hard surfaces can feel hotter than expected.
Treating privacy as an afterthought
It’s easier to place the pergola where privacy is naturally better than to “fix” a poor spot with heavy screening later.
Q&A: What if my only viable spot has either sun problems or privacy problems?
Pick the spot where the “fix” is more natural. Sun issues can often be solved with smart shading and orientation. Privacy issues can be solved with layered screening and planting. But if you have to fully enclose the pergola to feel comfortable, you may lose the breezy outdoor feel—so consider shifting the placement even slightly to reduce how much screening you need.
When it’s worth getting professional advice
Keeping this informational (and not salesy), there are moments where extra expertise prevents expensive rework:
• Exposed sites with strong winds (especially coastal or elevated blocks)
• Complex drainage or sloping yards
• Attachments to an existing structure where engineering matters
• Builds near boundaries where local requirements may apply
• Large spans or unusual layouts where footing locations are constrained
Even if you’re doing the early planning yourself, these are good triggers to pause and check assumptions.
FAQ: pergola placement in Australian backyards
Where should I put a pergola in my backyard?
Put it where it supports how you’ll use it most—then refine the spot by checking the sun at 9 am, midday and 4 pm, how breezes move through the yard, and the main neighbour sightlines. The best placement usually balances shade at your peak use time with airflow and manageable privacy.
How do I figure out sun angles without special tools?
Do a simple observation check at different times of day and note where shadows fall. If you want a deeper explanation of how orientation and shading work in Australia, you can read Your Home’s guidance on orientation and shading.
Is it better to place a pergola near the house or away from it?
Near the house, usually increases everyday use and suits dining/servery access. Away from the house can be better for privacy, breezes, and creating a dedicated “retreat” zone—especially near a pool or garden feature. The best choice depends on how you move through your home and yard.
How do I block the harsh afternoon sun under a pergola?
Start with placement so the pergola isn’t fully exposed to west/north-west sun. Then consider partial side screening (slats/battens) on the afternoon side, and avoid reflective paving directly beneath seating. The key is stopping low-angle glare while preserving airflow.
How can I add privacy without blocking the breeze?
Use “filtering” solutions: battens with spacing, angled screens, climbing plants on open trellis, and layered planting. Place seating so it’s not directly aligned with neighbour windows, and use screens to block specific sightlines rather than enclosing the whole structure.
Does pergola size affect comfort?
Yes. Size changes shade coverage, airflow, how furniture fits, and whether privacy screens feel heavy. A well-sized pergola keeps the main seating shaded at your peak use time, allows clear walkways, and doesn’t trap warm air over hard surfaces.
What’s the biggest placement mistake to avoid?
Ignoring low-angle morning/afternoon sun. A spot that feels fine at midday can become unbearable later. Always check the yard at the times you’ll actually use the space.