Blog
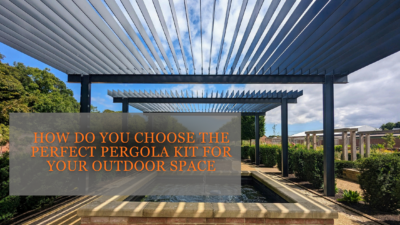
How to Prepare Your Backyard for a Pergola Installation (Site Levels, Drainage, and Footings)
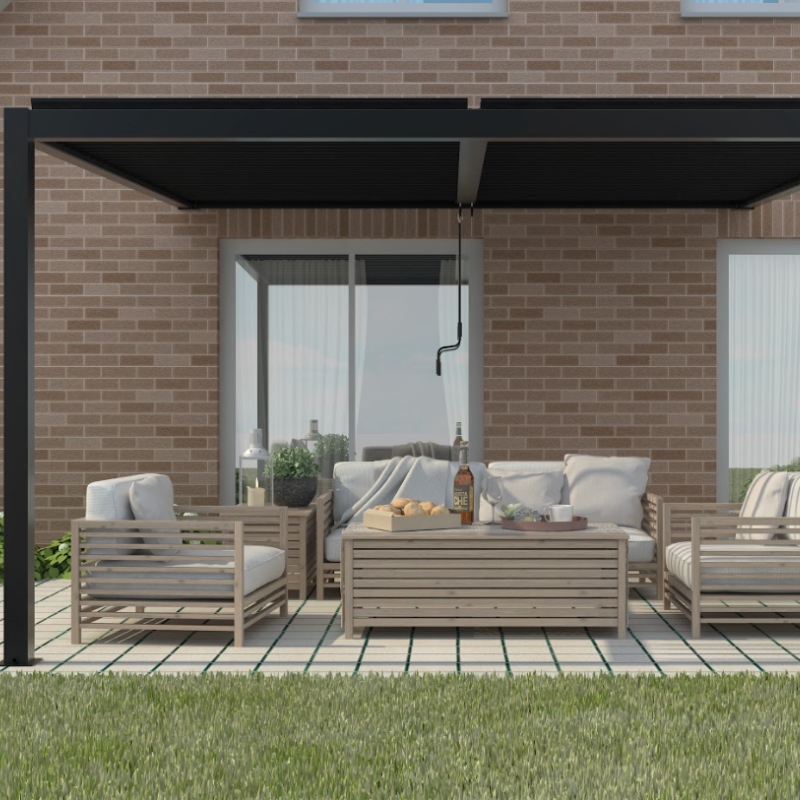
A pergola can look simple on the plan, but the success of the build is usually decided before the first post goes in—especially with pergola kit, where the parts are designed to go together square and true. If the ground is out of level, water runs the wrong way, or your footing points aren’t properly set out, you can end up fighting the structure the whole way through—then spending the next few years dealing with doors that don’t shut, pavers that dip, or posts that move after heavy rain.
This guide is written for Australian backyards and conditions, where you might be working with reactive clay, sandy coastal soils, sudden downpours, or sloping blocks. It’s not about selling anything—it’s about getting your site ready so the installation is smoother and the result lasts.
Start with a quick “walk-the-yard” assessment
Before you measure anything, do one slow lap of the area with your phone camera and a notepad. You’re looking for clues about how the site behaves across the seasons.
What to look for in 10 minutes
• Where does water go after a storm—toward the house, toward a fence, or into a low spot?
• Are there downpipes that dump straight onto the ground near the proposed pergola area?
• Do you have garden beds hard up against the house wall (these can trap moisture near footings)?
• Is the ground “spongy” underfoot or cracked and hard (both can point to movement across seasons)?
• Are there existing hard surfaces (concrete, pavers, decking) that will affect drainage and fixing options?
• Are there retaining walls, big trees, or exposed roots near where posts would ideally land?
• Is access easy for materials, post-hole digging, and concrete (or will you be wheelbarrowing everything)?
Q&A: What’s the number-one thing people miss at this stage?
Most people underestimate drainage. If you’re not sure where water travels now, you can accidentally build a nice new “dam wall” that directs runoff exactly where you don’t want it—often back toward the house or into a neighbour’s yard.
Step 1: Confirm boundaries, services, and “no-go” zones
Site prep isn’t only about dirt. It’s also about not digging where you shouldn’t.
Mark your “constraints” early
• Boundary lines and fences (even if the pergola isn’t near them, you’ll measure off from them)
• Eaves and gutters (particularly if you’re planning an attached structure)
• Underground and overhead services (gas, water, stormwater, electrical, NBN)
• Septic systems or soak wells (where applicable)
• Existing irrigation and lighting runs
In Australia, you should use the free utility location service commonly known as Dial Before You Dig (now delivered nationally as BYDA) before any excavation. The plans won’t always show exact depths and positions, but they’re a critical first filter so you’re not digging blind.
Q&A: If I’m only digging a few post holes, do I still need to check services?
Yes. A “small” post hole can still hit a communications conduit, water line, or electrical cable. The cost and disruption from a strike is rarely small.
Step 2: Set out the pergola footprint properly (square beats “close enough”)
A pergola that’s out of square creates a domino effect: roof lines don’t align, fixings fight you, and finishing looks “off” even if you can’t immediately tell why.
A simple set-out method that works in most backyards
- Choose a reference edge (often the house wall, a straight fence line, or an existing slab edge).
- Establish a baseline with a tight string line.
- Mark your corners with stakes.
- Check squareness using diagonal measurements:
• Measure corner-to-corner diagonals; if they’re equal, your rectangle is square. - Mark post centres (not just post edges), and spray paint small crosses where holes will go.
If you’re still deciding layout and clearances, it can help to read through a planning checklist before locking anything in—especially if you’re balancing traffic flow, doors, barbecue placement, and furniture zones. A practical starting point is planning a pergola kit so your set-up matches real-world use, not just what “fits” on paper.
Q&A: How much error is acceptable when setting out?
Aim for millimetres, not centimetres. If you’re out 20–30 mm at the posts, that can become very noticeable across the roof line or slat alignment. Getting the footprint square is one of the cheapest “wins” you can bank.
Step 3: Measure slope and decide your finished level strategy
Backyards are rarely flat. The key question isn’t “Is it level?”—it’s “What level do I need, and where will water go when it rains?”
How to measure slope without fancy gear
You can do this with:
• A long straight timber or aluminium straightedge
• A spirit level
• A tape measure
• (Optional) a string line and a line level
Method:
- Place your straightedge on the ground in the direction water would likely run.
- Level it using the spirit level.
- Measure the gap from the low end of the straightedge down to the ground.
- Divide the drop by the distance to get a rough slope.
Even a small drop can matter. The goal is to avoid creating a low point under the pergola where water pools, mud forms, and footings stay wetter for longer.
Cut, fill, or step the site?
You typically have three options:
• Cut: Remove high spots to bring the whole area down
• Fill: Build up low spots (only with properly compacted material, not loose soil)
• Step: Keep natural slope and design the finished surface in levels (common near retaining walls or steep blocks)
If you’re using fill, compaction matters. Loose fill settles later, which can make posts appear to “sink” even if the footings are fine.
Q&A: Do I need the whole area perfectly level?
Not necessarily. What matters is:
• Post bases and structural points are correctly set and consistent
• The finished surface drains away from structures and doesn’t pond
• The pergola is installed plumb and square
You can have a slightly sloping finished surface under a pergola and still have a perfectly square, plumb structure—if you plan it.
Step 4: Plan drainage before you dig (especially in sudden Aussie downpours)
Drainage is often treated as “later”. That’s backwards. Drainage affects where your footings go, how deep you dig, and what base materials you use.
Understand the three common backyard water problems
1) Surface runoff (water flows across the top)
This is the most common. It shows up as:
• Water racing across the yard in sheets
• Erosion near paths and garden edges
• Water collecting at a low point
What helps:
• Ensuring the finished surface falls away from the house
• Avoiding “bathtubs” created by garden edging, sleepers, or new paving borders
• Directing water to an appropriate discharge point (not under the pergola)
2) Downpipe discharge (roof water dumped onto the ground)
A downpipe that empties near the pergola area can saturate soil around footings.
What helps:
• Connecting downpipes to stormwater where possible
• Redirecting discharge away from footings and the house wall
• Keeping garden beds from trapping water near the base of posts
3) Poor infiltration (water can’t soak in)
This is common on heavy clay and compacted ground. Water sits longer, keeping footings wetter and increasing movement risk on reactive sites.
What helps:
• Improving surface grading so water moves away quickly
• Avoiding sealing everything with non-permeable surfaces unless drainage is managed
• Considering sub-surface drainage solutions where appropriate (best discussed with a drainage professional)
One Australian-specific note: reactive clay and moisture control
Many Australian suburbs sit on reactive clay. The challenge isn’t just “wet”—it’s uneven moisture. If one side of the structure stays wetter because of pooling, a garden bed, or a leaking tap, you can get differential movement over time.
If your site shows big seasonal cracks in summer and soft, sticky soil in winter, treat drainage and moisture control as a top priority.
Q&A: How do I prevent water pooling under my pergola?
Work backwards from the “worst day”:
• Where will water go during a heavy storm?
• What will stop it (edging, paving borders, the pergola posts themselves)?
• Where does it end up?
Then set your finished levels so water has a clear path away from the house and away from the footing points.
Step 5: Choose the right footing approach for your site conditions
Footings aren’t one-size-fits-all. Soil type, exposure, and design loads matter. This is where “copy what your mate did” can go wrong.
The job of a footing (in plain terms)
A footing has to:
• Spread the load into the ground
• Resist uplift (wind can try to pull parts of a structure up)
• Resist lateral movement (racking forces in gusty conditions)
• Stay stable through wet/dry cycles
In Australia, it’s also wise to treat structural adequacy as part of broader compliance thinking. The National Construction Code (NCC) is the baseline for building performance expectations, and local requirements can apply depending on where you live and what you’re building.
Common footing readiness checklist (before you dig)
• Your post centres are clearly marked and double-checked for square
• You have clearance from services and known obstructions
• You’ve decided on the finished surface height (so you don’t set posts too high/low)
• You’ve planned where excavated spoil will go
• You have a plan for wet weather (open holes + rain can turn into a mess fast)
What changes footings in real backyards?
• Steep slope: may require deeper or stepped solutions
• Retaining walls nearby: changes ground behaviour and may need engineering advice
• Sandy/coastal soils: can slump; hole stability and compaction matter
• Reactive clay: moisture variation can drive movement; drainage and detailing matter
• Tree roots: can force post relocation or require a different approach
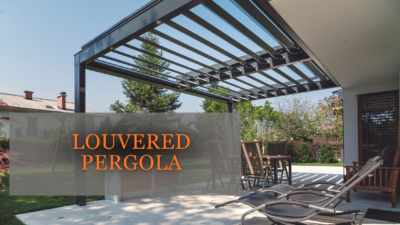
If you’re comparing different designs and how they interact with your ground conditions, it helps to look at pergola kit options with an eye on what your site will realistically support (rather than only what looks best in photos).
Q&A: How deep should pergola footings be?
There isn’t a universal depth that’s “right” for every backyard. Depth and sizing depend on:
• Soil type and stability
• Wind exposure and loads
• Structure size and fixing method
• Whether it’s freestanding or attached
• Local requirements and design details
If you’re on a steep block, near a retaining wall, or on highly reactive clay, it’s sensible to seek professional guidance rather than rely on generic rules of thumb.
Step 6: Prepare the surface under and around the pergola
What sits under the pergola affects drainage, comfort, and ongoing maintenance. The “right” choice depends on how you’ll use the space.
Common surface choices and site-prep implications
Grass
• Pros: cooler underfoot, simple to keep
• Watch-outs: can become muddy if drainage is poor; mowing around posts can be annoying
• Site prep focus: drainage paths, not creating low points
Gravel or decomposed granite
• Pros: good drainage if properly layered; easy to repair
• Watch-outs: needs edging; can migrate without correct base prep
• Site prep focus: compacted base, weed barrier approach (if desired), clear falls
Pavers
• Pros: clean, usable surface; great for entertaining
• Watch-outs: can pond if levels aren’t right; can settle on poor fill
• Site prep focus: proper base compaction, consistent fall, drainage planning
Concrete slab
• Pros: durable, low-maintenance, stable
• Watch-outs: needs correct falls and drainage; more permanent
• Site prep focus: levels, formwork, drainage, and fixing coordination
Q&A: Can I install a pergola over existing pavers or concrete?
Sometimes, yes—but it depends on how the structure is designed to be fixed and whether the existing surface and base are suitable. The big risk is assuming the surface is “solid enough” when the underlying base might not be, or the falls might be wrong for drainage.
Step 7: Get “installation day ready” with a practical checklist
Site prep isn’t complete until the work area is safe, accessible, and predictable.
The day-before checklist
• Clear and mark the delivery/laydown area for materials
• Trim back plants so string lines and measurements aren’t obstructed
• Confirm access width for wheelbarrows, concrete, or post-hole digging equipment
• Decide where spoil goes (skip, trailer, designated pile)
• Protect nearby surfaces (pavers, decking, pool edging)
• If rain is forecast, plan to cover open holes and keep water out
The “don’t get caught out” list
• Keep pets and kids away from set-out strings and holes
• Don’t leave holes open overnight without protection (especially if rain is possible)
• Re-check square after you adjust anything—moving one stake can throw off the lot
Q&A: What should I do if I hit roots exactly where a post needs to go?
Stop and reassess. Cutting major roots can affect tree health and can still leave you with unstable ground. Options might include:
• Adjusting post location (if design allows)
• Consulting an arborist (for significant trees)
• Seeking advice on alternative footing solutions
Common mistakes that cause long-term problems
These are the issues that most often lead to “it looked fine for six months… then it started moving.”
• Building on topsoil or loose fill instead of properly prepared ground
• Ignoring where stormwater and downpipes discharge
• Setting out by eye instead of measuring diagonals and squareness
• Creating a low point under the pergola that holds water
• Failing to check for services before digging
• Rushing footing preparation in wet conditions (holes slump, bases soften)
• Not planning for curing time if concrete is involved
If you’re still deciding what kind of build makes sense for your yard and lifestyle, this is a useful question to hold in mind: What should you know before buying a pergola kit? Even purely as an educational exercise, it helps you match design expectations to site reality.
A simple site-prep timeline (so it doesn’t feel overwhelming)
7–14 days before
• Confirm concept layout and footprint size
• Request service plans (BYDA)
• Identify drainage issues and decide on the finished surface approach
2–5 days before
• Set out footprint with string lines
• Confirm square and mark post centres
• Prepare access and clear vegetation
1 day before
• Double-check levels and drainage paths
• Organise spoil plan and site protection
• Stage tools and materials
Installation day
• Reconfirm the square before committing to holes/footings
• Keep holes clean and protected if the weather changes
• Take photos of the set-up and measurements for reference
FAQ
How level does the ground need to be for a pergola?
The structure needs to be installed plumb and square, but the ground under it doesn’t always need to be perfectly level. What matters most is that post locations are correctly set out, the base is stable, and the finished surface won’t trap water.
How do I stop water from pooling under a pergola?
Start by setting finished levels so water has a path away from the house and away from footing points. Watch for “bathtub” edges created by paving borders, sleepers, and garden edging. Address the downpipe discharge early.
Do I need drainage under a pergola?
Not always, but you do need a plan for where water goes. If your yard already ponds, sits wet for days, or is heavy clay, drainage planning becomes much more important.
Can I build a pergola on a sloping block?
Yes, but you’ll usually need a more deliberate approach to levels and set-out. Steeper slopes can introduce retaining wall interactions, stepped surfaces, and higher structural demands—situations where professional advice is often worthwhile.
What if my yard is reactive clay?
Reactive clay sites are sensitive to uneven moisture. Prioritise drainage and consistent moisture management, avoid trapping water near footings, and be cautious about creating one persistently wet area next to a dry one.
Should I pour footings in wet weather?
Wet conditions can collapse holes, soften bases, and make accurate set-out harder. If you must work in wet weather, take extra care to keep holes protected and avoid pouring into unstable or waterlogged excavations.
What’s the best way to check if my set-out is square?
Use diagonal measurements. If the diagonals of your rectangular footprint match, it’s a square. Recheck after any adjustment.